
Roles & Permissions
Roles & Permissions provide granular access control for your restaurant staff. By creating roles with specific permissions, you ensure each staff member can access only the features they need for their job. This improves security, reduces errors, and streamlines workflows. Navigate to Settings → Roles & Permissions to manage roles.
Understanding Roles & Permissions
What are Permissions?
Permissions are predefined access rights that control what actions a user can perform in the system:
- View: See/read data (lists, details)
- Create: Add new records
- Edit: Modify existing records
- Delete: Remove records
Permissions are grouped by module (Staff Members, Menu, Orders, Inventory, etc.)
What are Roles?
Roles are collections of permissions assigned to staff members. Each staff member must have exactly one role, which determines their access level throughout the application.
Access Control
Think of permissions as building blocks and roles as blueprints. You combine permissions to create roles that match your restaurant positions (Manager, Waiter, Chef, etc.)
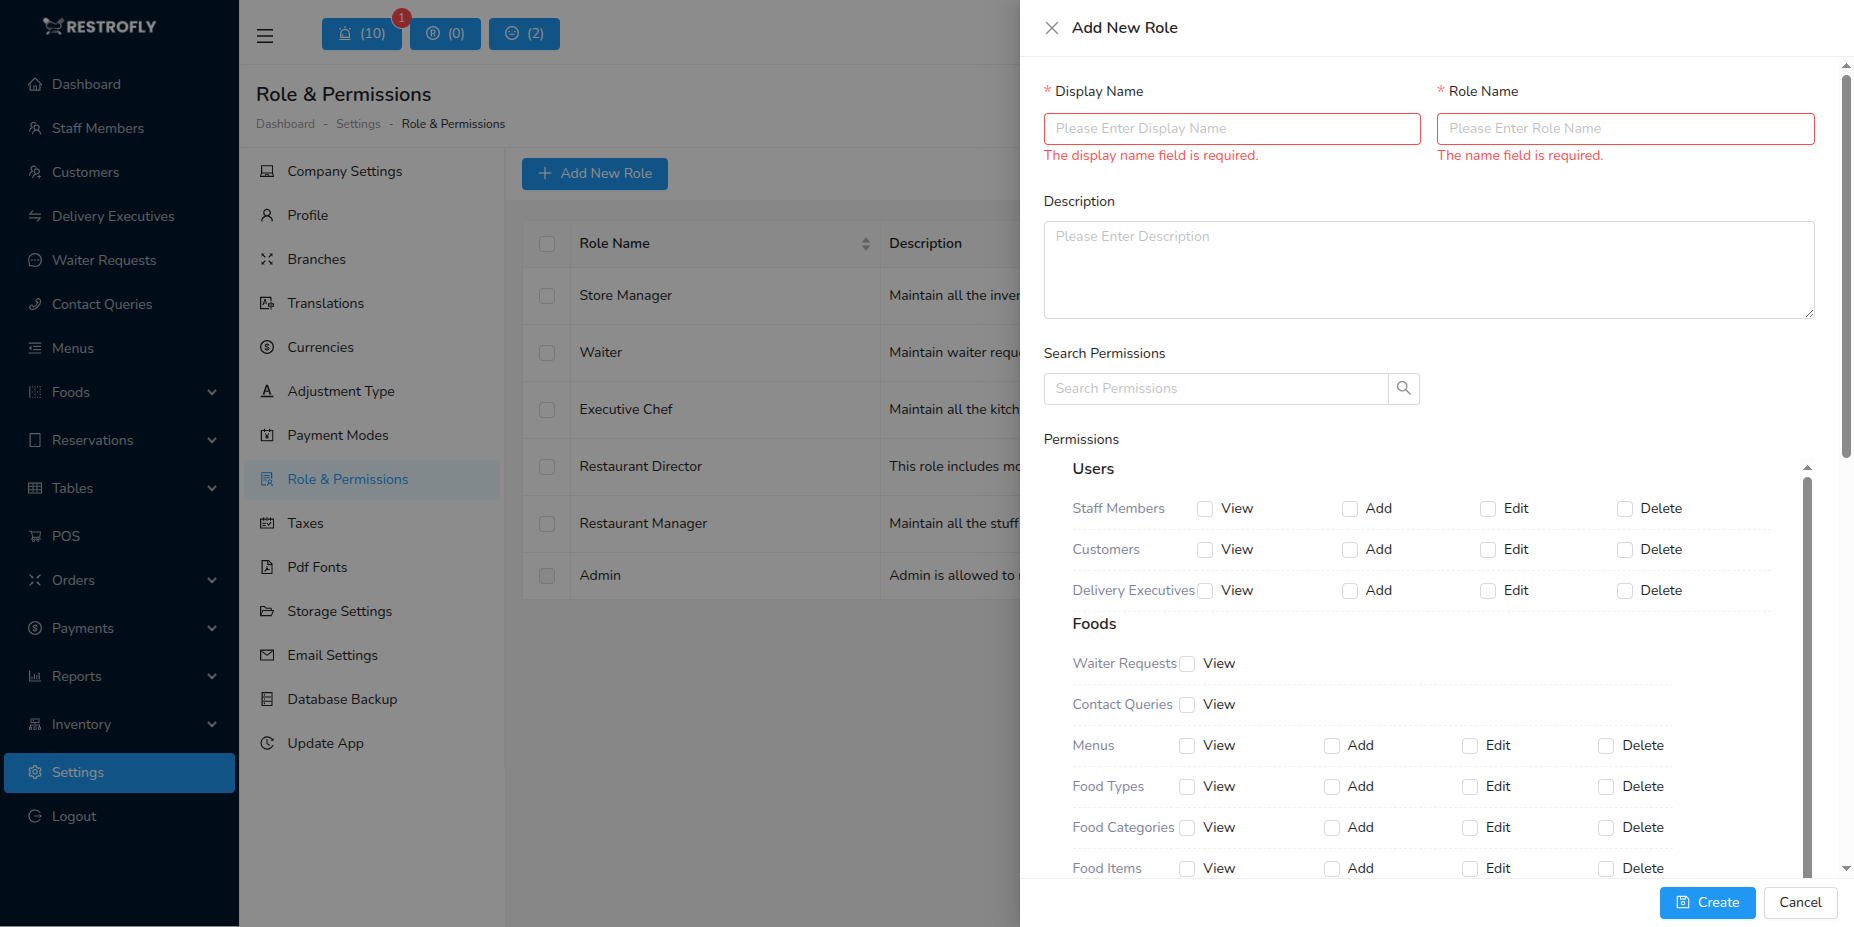
Creating a New Role
When creating or editing a role, configure the following:
Display Name
- Display Name: The human-readable name shown throughout the application (required)
- Examples: Restaurant Manager, Head Chef, Waiter, Receptionist, Inventory Manager
- Appears in staff member profiles and selection dropdowns
- Should clearly indicate the position or responsibility level
- Can include spaces and special characters
Naming Convention
Use job titles that your staff recognize: "Floor Manager" instead of "Manager1", "Senior Waiter" instead of "Waiter_L2"
Role Name
- Role Name: The system identifier for this role (required)
- Auto-generated as you type the Display Name
- Converts Display Name to lowercase with underscores
- Example: "Restaurant Manager" → "restaurant_manager"
- Must be unique across all roles
- Cannot contain spaces or special characters
- Can be manually edited if needed
Role Name Format
The Role Name is used internally by the system. Once created and assigned to staff members, changing it may cause issues. Choose carefully!
Description
- Description: Optional text explaining the role's purpose and responsibilities
- Helps administrators understand what this role is for
- Example: "Manages front-of-house operations, handles customer complaints, oversees waitstaff"
- Useful when you have many similar roles
- Not visible to staff members, only to administrators
Search Permissions
- Search Box: Quickly find specific permissions in the large permissions list
- Type keywords to filter permissions
- Examples: "menu", "order", "view", "delete"
- Helps locate permissions quickly when you have many modules
Permissions Selection
- Permission Checkboxes: Select which permissions to grant to this role
- Organized by module and feature
- Each row typically shows: Module Name, then View/Create/Edit/Delete checkboxes
- Check all permissions this role needs
- Leave unchecked for restrictions
Common Permission Modules:
- Staff Members (view, create, edit, delete)
- Menu Management (categories, items, modifiers)
- Orders (view, create, edit, delete)
- Tables (view, create, edit, delete)
- Reservations (view, create, edit, delete)
- Inventory (view, create, edit, delete)
- Reports (view various reports)
- Settings (access to configuration)
Permission Granularity
Most features have 4 permission levels (View, Create, Edit, Delete). Grant only what's needed: waiters might need "Orders - View & Create" but not "Orders - Delete"
Common Role Examples
Admin
- Display Name: Admin
- Role Name: admin
- Description: Full system access - cannot be deleted
- Permissions: ALL (predefined)
- Use: System administrators and owners
Admin Role
The Admin role is predefined and cannot be deleted or edited. It has unrestricted access to all features. Assign this role only to trusted personnel.
Restaurant Manager
- Display Name: Restaurant Manager
- Role Name: restaurant_manager
- Description: Oversees daily operations, manages staff, reviews reports
- Suggested Permissions:
- Staff Members: View, Create, Edit (not Delete)
- Menu: View, Edit
- Orders: View, Edit
- Tables: View, Create, Edit, Delete
- Reservations: View, Create, Edit, Delete
- Inventory: View, Edit
- Reports: View all reports
- Settings: View (limited editing)
Head Chef / Kitchen Manager
- Display Name: Head Chef
- Role Name: head_chef
- Description: Manages kitchen operations, menu items, inventory
- Suggested Permissions:
- Menu: View, Create, Edit
- Orders: View (kitchen orders)
- Inventory: View, Create, Edit
- Reports: View (inventory & sales reports)
Waiter / Server
- Display Name: Waiter
- Role Name: waiter
- Description: Takes orders, serves customers, processes payments
- Suggested Permissions:
- Menu: View only
- Orders: View, Create, Edit (own orders)
- Tables: View, Edit (status)
- Reservations: View only
- Inventory: No access
Receptionist / Host
- Display Name: Receptionist
- Role Name: receptionist
- Description: Manages reservations, greets customers, assigns tables
- Suggested Permissions:
- Tables: View, Edit (status)
- Reservations: View, Create, Edit, Delete
- Orders: No access
- Inventory: No access
Inventory Manager
- Display Name: Inventory Manager
- Role Name: inventory_manager
- Description: Manages stock, adjustments, purchases
- Suggested Permissions:
- Inventory: View, Create, Edit, Delete
- Menu: View only (to understand item requirements)
- Adjustments: View, Create, Edit
- Reports: View (inventory reports)
Creating Roles - Step by Step
- Navigate to Settings → Roles & Permissions
- Click Add New Role or Create Role
- Enter Display Name (e.g., "Floor Manager") - The Role Name auto-generates as you type
- Optionally edit Role Name if needed
- Add a Description explaining this role's purpose (optional but recommended)
- Scroll through the permissions list or use Search to find specific permissions
- Check the boxes for all permissions this role needs - View: Almost always needed to see the module - Create: If they need to add new records - Edit: If they need to modify existing records - Delete: Only if they should be able to remove records (use sparingly)
- Review your selections
- Click Save or Create
Start Restrictive
When creating new roles, start with minimal permissions and add more as needed. It's easier to grant additional access than to revoke it after staff are accustomed to having it.
Assigning Roles to Staff
After creating roles:
- Go to Users → Staff Members
- Create or edit a staff member
- Select the appropriate role from the dropdown
- Save
The staff member will immediately have access according to their role's permissions.
Managing Existing Roles
Editing Roles
- You can modify Display Name, Description, and Permissions at any time
- Changes apply immediately to all staff members with that role
- Be cautious: editing permissions affects all users with this role
Role Edits Impact All Users
If you edit a role's permissions, ALL staff members assigned to that role are affected immediately. Test permission changes carefully.
Deleting Roles
- You cannot delete roles that are currently assigned to staff members
- First reassign those staff members to different roles
- Then delete the role
- Admin role cannot be deleted (system protection)
Duplicating Roles
- If your system supports it, duplicate an existing role as a starting point
- Then modify the new role's permissions
- Saves time when creating similar roles (e.g., "Senior Waiter" based on "Waiter")
Best Practices
Use Job Titles for Role Names
- "Restaurant Manager" not "Role1"
- "Head Chef" not "KitchenAdmin"
- Makes it easy for everyone to understand access levels
Document Role Purposes
- Always fill in the Description field
- Explain what this role is for and who should have it
- Helps future administrators understand your access control structure
Follow Principle of Least Privilege
- Grant only the minimum permissions needed for job duties
- Don't give Delete permissions unless absolutely necessary
- Start restrictive, expand if needed
Regularly Review Roles
- Audit roles quarterly to ensure they still make sense
- Remove obsolete roles that are no longer used
- Update permissions as job responsibilities change
Test New Roles
- Create a test user account with the new role
- Log in as that user and verify they can (and can't) access what you expect
- Adjust permissions before assigning to real staff
Limit Admin Role
- Assign Admin role only to owners and senior management
- Use Manager roles for day-to-day operations
- Reduces risk of accidental data deletion or configuration changes
Branch-Specific Roles
- In multi-branch setups, consider branch-specific roles
- Example: "Branch A Manager" vs "Branch B Manager"
- Ensures managers only access their branch data
Permission Patterns
Read-Only Role (Reports Viewer)
- All View permissions
- No Create, Edit, or Delete permissions
- Good for: accountants, auditors, analysts
Operational Role (Waiter, Chef)
- View and Create permissions for core features
- Limited Edit permissions (only own records)
- No Delete permissions
- Good for: front-line staff
Management Role (Manager, Supervisor)
- View, Create, Edit permissions for most features
- Limited Delete permissions
- Settings: View only or limited edit
- Good for: mid-level management
Administrative Role (Admin, Owner)
- All permissions including Delete
- Full Settings access
- Good for: owners, IT administrators
Staff Training
When assigning roles, train staff on what they can and cannot do in the system. Clear expectations prevent frustration and support tickets.
Security Consideration
Roles with Delete permissions can permanently remove data. Assign these carefully and ensure staff understand the implications of deleting records.
Troubleshooting
Staff Member Can't Access a Feature
- Check their assigned role
- Verify the role has the necessary View permission for that module
- If they need to add/edit, ensure Create/Edit permissions are also granted
Permission Changes Not Taking Effect
- Have the user log out and log back in
- Permissions are typically loaded at login
- In some cases, clearing browser cache may help
Can't Delete a Role
- Role is still assigned to one or more staff members
- Go to Staff Members, find users with this role, and reassign them
- Then you can delete the role
Too Many Similar Roles
- Consolidate similar roles to simplify management
- Example: Instead of "Waiter_Morning" and "Waiter_Evening", use one "Waiter" role
- Use other fields (like shift schedules) to differentiate staff
Role Simplicity
Fewer, well-defined roles are easier to manage than many overlapping roles. Aim for 5-8 roles for most restaurants.